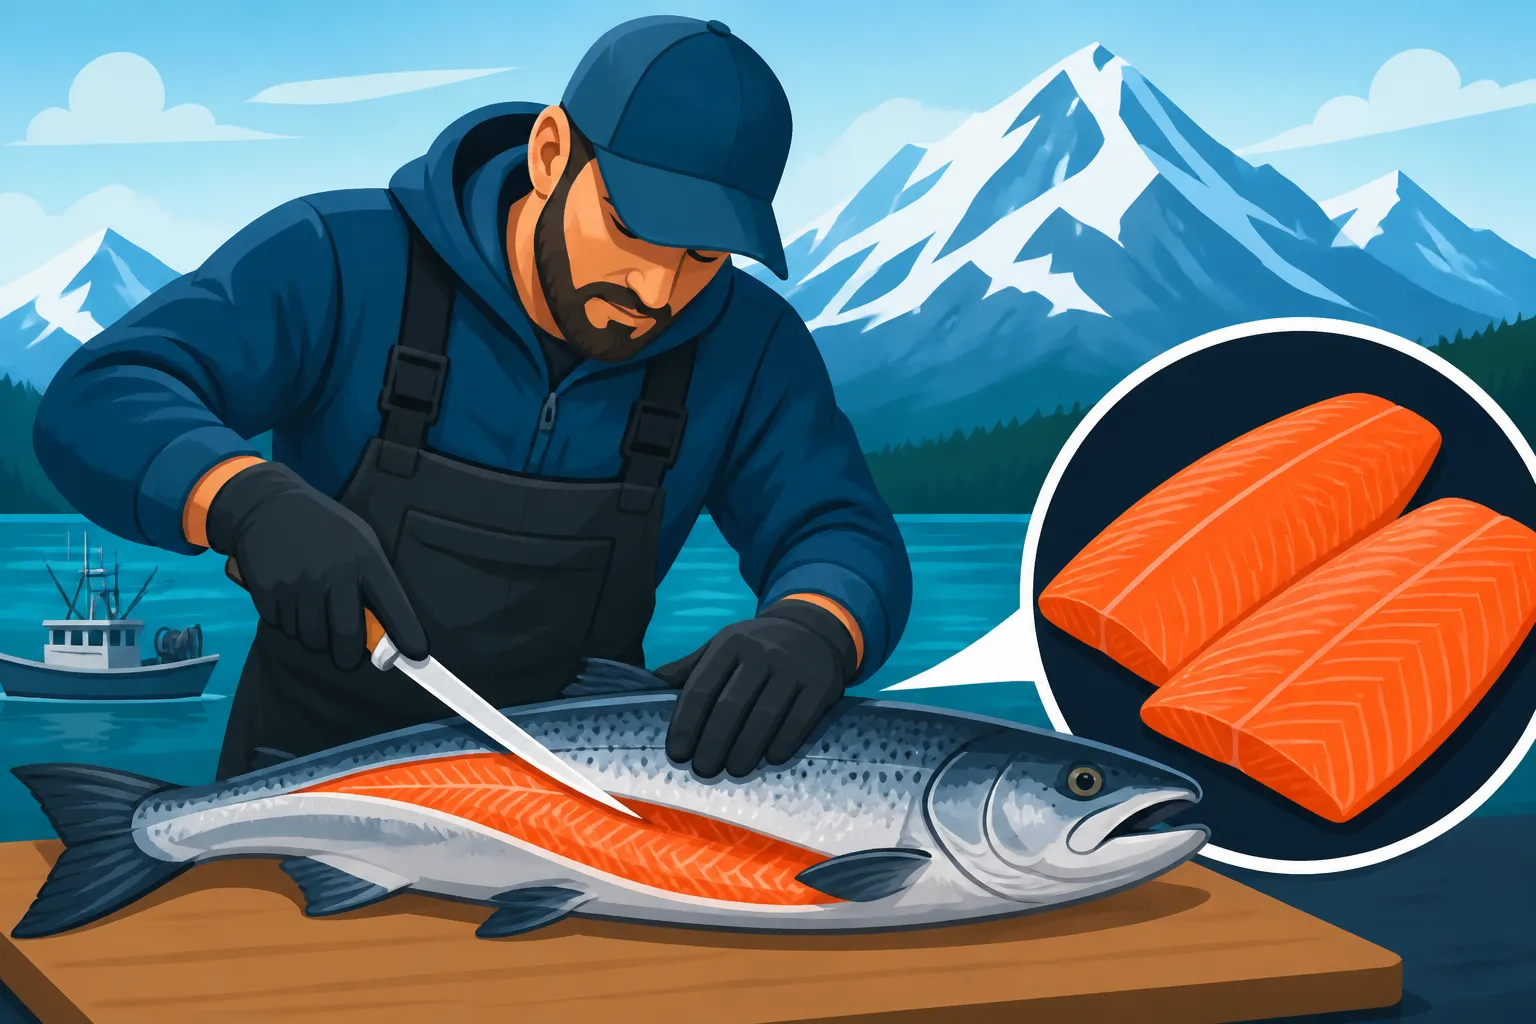
How to Fillet a Salmon in Alaska
You've spent days dreaming of it, maybe even weeks planning your epic adventure to the Last Frontier, and then finally, you've done it – you've landed that magnificent Alaska salmon! The adrenaline is still pumping, the photos are taken, and now you're standing there, admiring your catch, but a tiny thought creeps in: "Okay, now what? How do I turn this beautiful fish into perfect fillets without wasting an ounce of that precious meat?" It's a common moment of hesitation, especially for those new to processing their own catch. This guide is here to banish that uncertainty, walking you through a step-by-step process to confidently fillet your salmon like a seasoned Alaskan pro, ensuring every bite is a testament to your hard-earned success.
Essential Gear for Filleting Salmon
Before you even think about laying a knife on your hard-won salmon, gathering the right tools is paramount. Trust me, trying to fillet a magnificent King Salmon with a dull, flimsy kitchen knife is a recipe for frustration and wasted meat. Having the proper equipment not only makes the job easier and faster but also ensures cleaner cuts and a much higher yield. It’s an investment that pays dividends in delicious salmon dinners.
Choosing the Right Fillet Knife
The fillet knife is undoubtedly the star of this show, and not all knives are created equal for the task of breaking down a salmon. What you're looking for is a blade that's long, flexible, and razor-sharp. For Alaska salmon, which can range from a modest Sockeye to a massive King, a blade length of 8 to 10 inches is generally ideal. This length allows you to make long, sweeping cuts along the spine without having to constantly reposition your knife, which can lead to jagged edges and less clean fillets.
The flexibility of the blade is also crucial. A flexible blade allows you to follow the contours of the fish's bones, getting as close as possible to the skeleton to maximize the amount of meat you recover. A stiff blade, while great for other tasks, will fight you here. And, perhaps most importantly, your knife absolutely must be sharp. A dull knife is a dangerous knife, requiring more force and increasing the risk of slips. If your knife isn't shaving sharp, take the time to hone it before you begin. Many anglers swear by knives from brands like Dexter-Russell or Rapala, which are readily available on platforms like Amazon and designed specifically for fish processing. For more gear insights, you might find our comprehensive guide on Alaska Fishing Gear and Tackle Guide helpful.
The Importance of a Good Fillet Board
You might think any old cutting board will do, but a good fillet board can make a surprising difference in the filleting process. The primary function of a fillet board is to provide a stable, non-slip surface that keeps your fish from sliding around while you're working. Imagine trying to make precise cuts on a wet, slick salmon that's constantly shifting – it's not just messy, it's genuinely hazardous.
Look for a board made from a durable, food-grade plastic that's easy to clean. Many specialized fillet boards feature a clamp at one end to securely hold the fish's tail, preventing any movement. Others have channels around the edge to catch juices, keeping your workspace cleaner. Size matters too; ensure your board is large enough to comfortably accommodate the entire length of your salmon. A large, sturdy board provides the confidence you need to make powerful, controlled cuts, especially when dealing with the substantial size of a prime Alaska King Salmon.
Other Helpful Tools
Beyond the knife and board, a few other items can make your salmon filleting experience much smoother and safer. First, consider wearing a pair of cut-resistant gloves, especially if you're new to filleting or just want an extra layer of protection. These can be found in various sizes on Amazon and offer peace of mind.
A heavy-duty towel or a dedicated fish rag is essential for wiping down your hands, the knife, and the board as you go. This helps maintain a cleaner, less slippery work environment. Some anglers also like to have a scale scraper on hand, though for salmon that will be skinned, this step is often skipped. Finally, make sure you have a large cooler nearby, preferably with ice. As soon as a fillet is off the fish, it should go straight into a cold environment to preserve its quality. Proper post-catch handling, as detailed in our guide on Alaska Fish Transport and Shipping Rules, is crucial for delicious fish.
Preparing Your Salmon for Filleting
The quality of your final fillet isn't just about your knife skills; it starts the moment the fish comes out of the water. How you handle and prepare your salmon before filleting significantly impacts the taste, texture, and longevity of the meat. Neglecting these crucial initial steps can undermine all your efforts down the line, so pay close attention.
Handling Your Catch Properly
The first rule of excellent fish preparation is proper handling immediately after the catch. In Alaska, where the waters are often teeming with fish, you'll see seasoned anglers take these steps without hesitation. As soon as you land your salmon – after the celebratory photos, of course – it should be bled. Bleeding involves making a quick, clean cut to the gill arch or severing the caudal artery near the tail. This allows the blood to pump out of the fish, which prevents it from congealing in the flesh and causing a "fishy" taste or reducing the meat's shelf life. It also results in whiter, cleaner-looking fillets.
After bleeding, the fish should be immediately immersed in an ice slurry or placed on ice in a cooler. Keeping the fish cold and wet slows down bacterial growth and prevents rigor mortis from setting in too quickly, which can toughen the meat. This isn't just a nicety; it's a critical step that professional processors and guides in places like the Kenai Peninsula swear by to ensure top-quality seafood. Remember, you've likely worked hard to catch it – whether it was a powerful King Salmon or a feisty Silver Salmon – so treat it with respect from the start. Our article on Best Fishing Techniques for Alaska also touches on responsible angling practices that extend to post-catch care.
Cleaning and Rinsing
Once you're ready to fillet, give your salmon a good rinse under cold, running water. This helps remove any slime, loose scales (if you're not planning to skin immediately), or debris that might have accumulated during transport. While some people choose to scale their salmon before filleting, for the purpose of creating skin-off fillets, this step is generally unnecessary. The skin will be removed later, taking any scales with it.
The goal here is a clean, manageable fish. Lay your salmon on your fillet board, belly side up, and ensure it's stable. Some anglers like to make a small cut around the vent to prevent any digestive contents from contaminating the meat during the filleting process, though this is often not strictly required if the fish is properly bled and gutted promptly. For a full rundown on regulations, which includes limits that inform how much you'll be processing, check out Alaska Fishing Regulations Explained.
Step-by-Step Salmon Filleting Techniques
Now for the main event: transforming your whole salmon into beautiful, boneless, skinless fillets. This process might seem daunting at first, but with a sharp knife, a stable surface, and a bit of patience, you'll be amazed at how quickly you can master it. Each cut builds on the last, designed to maximize your yield while minimizing effort.
The Initial Cuts: Creating Fillets
This is where your long, flexible fillet knife truly shines. Lay your salmon flat on its side on the fillet board, head facing away from you, with the back of the fish closest to your dominant hand.
- Behind the Gill Plate: Start by making a cut just behind the gill plate, angling your knife slightly towards the head. Cut down until you feel the spine, but don't cut through it. You're creating a starting point for your main fillet cut.
- Along the Spine: With your knife tip still at the spine, turn your blade so it's running parallel to the backbone. Using long, smooth strokes, gently slice along the top of the spine, working your way towards the tail. Keep the blade pressed against the bones. You'll feel the blade scraping along the backbone – that's what you want!
- Over the Rib Cage: As you move down the fish, you'll encounter the rib bones. Here, you have two options:
- Option A (Easier): Cut over the rib cage, leaving the ribs attached to the fillet. You'll remove these in a separate step. This is often preferred by beginners as it ensures more meat stays with the fillet.
- Option B (More Advanced): Carefully cut around and under the rib bones, trying to separate them from the fillet as you go. This takes more practice but can result in a slightly cleaner initial fillet.
- Separating the Fillet: Continue your cut all the way to the tail, separating the entire side of meat from the carcass. Once one fillet is removed, flip the fish over and repeat the entire process on the other side. This careful approach helps you get the most out of your catch, which is vital when you're adhering to strict Alaska Salmon Bag Limits by Species.
Removing the Rib Bones
If you chose Option A in the previous step, your fillets will now have the rib bones still attached. Don't worry, these are easy to remove. Lay the fillet skin-side down on the board. Locate the row of rib bones.
- Straight Cut Method: Starting from the belly side of the fillet, carefully make a cut just beneath the rib bones, angling your knife slightly up to hug the bones. Slice along the entire length of the rib cage, removing the section of meat with the bones attached. Try to keep this cut as shallow as possible to avoid losing too much meat.
- V-Cut Method: Some prefer a V-cut, where you make two angled cuts that meet at the top of the rib bones, effectively removing a V-shaped section of meat containing the ribs. This can sometimes be a bit more wasteful but ensures all rib bones are gone.
Whichever method you choose, the goal is to remove those pesky bones while sacrificing as little delicious salmon meat as possible. You'll find that with practice, this step becomes quick and intuitive, especially if you've already mastered the initial cuts for species like those found during the Alaska Sockeye Salmon Run Timing on the Kenai River.
Skinning the Fillet
For most culinary applications, particularly pan-searing or baking, removing the skin is preferred. Skinning a salmon fillet is surprisingly simple once you get the hang of it.
- Position the Fillet: Place the fillet skin-side down on your clean fillet board. Make sure the tail end is facing towards your dominant hand (or away, depending on your comfort).
- Initial Cut: Grab the tail end of the fillet firmly with your non-dominant hand. Make a small cut at the very end, just above the skin, creating a tab of skin that you can hold onto.
- Slice and Pull: Angle your knife slightly downwards towards the board. While pulling the skin tautly with your non-dominant hand, gently saw your knife back and forth, keeping the blade pressed against the skin. The key here is a steady, even pressure and a slight downward angle. The knife should do the work, separating the meat cleanly from the skin.
- Continue to the End: Continue this motion until the entire fillet is free from the skin. You should be left with a beautiful, boneless, skinless salmon fillet and a piece of skin that's mostly free of meat. This technique is similar to how you would approach skinning other large fish, like when you learn How to Fillet a Halibut.
Trimming and Pin-Boning
You're almost there! Your fillets are boneless and skinless, but a few final touches will elevate them to perfection.
- Trimming: Examine your fillets for any dark spots, excess belly fat, or residual bloodline. This dark meat, especially along the lateral line, can have a stronger, sometimes less desirable flavor. Use your sharp fillet knife to carefully trim these away, shaping the fillet into an aesthetically pleasing portion. Don't throw these trimmings out entirely; belly meat is often delicious smoked or fried, and scraps can be used for fish stock or salmon patties.
- Pin-Boning: Even after removing the rib cage, salmon typically have a line of small, fine pin bones running down the center of the fillet. These are easily felt by running your fingers along the length of the fillet. To remove them, grab a pair of clean needle-nose pliers or specialized fish bone tweezers (you can often find these alongside fillet knives on Amazon). Start from the head end of the fillet and pull each bone out in the direction it was growing, rather than straight up, to minimize tearing the flesh. Take your time with this step; nobody wants to find a surprise bone in their perfectly cooked salmon.
Advanced Tips and Common Mistakes to Avoid
Mastering the art of filleting salmon comes with practice, but there are always ways to refine your technique and avoid common pitfalls. Thinking beyond the basic cuts can help you make the most of your catch and preserve its quality for longer.
Maximizing Yield and Minimizing Waste
One of the biggest advantages of filleting your own fish, especially substantial catches like those from the Susitna River, is the control you have over maximizing yield. While the main fillets are obviously the prize, don't discard the rest of the fish without considering its potential. The collar, the meat-rich section just behind the gills and pectoral fins, is a delicacy often overlooked. It's fantastic grilled or baked. The belly strips, even after trimming off the darkest fat, can be cured or smoked for a rich, flavorful treat. Even the carcass, head, and trimmed bones can be simmered to create a fantastic fish stock, a base for chowders or risottos.
A common mistake is leaving too much meat on the bones. This usually happens when the knife isn't kept consistently close to the backbone or ribs. Focus on feeling the bone with your blade as you cut. Another error is making too many small, hesitant cuts. Confident, long, sweeping strokes are usually more effective and produce cleaner fillets. Remember, practice makes perfect, and with each salmon you fillet, you’ll find yourself getting closer to that ideal, waste-free process.
Maintaining Sharpness and Safety
A sharp knife is paramount not only for efficiency but also for safety. A dull blade requires more pressure, increasing the chance of slipping and causing injury. Take a few minutes to hone your knife before you start and even periodically during the filleting process if you're tackling multiple large fish. A simple ceramic honing rod or a pull-through sharpener can quickly restore a working edge. Safety also means being mindful of your hands. Always cut away from your body, and keep your non-dominant hand firmly on the fish, well out of the path of the blade. Using a non-slip fillet board, as discussed earlier, is a huge part of this. It’s a good habit to keep your workspace clean, regularly wiping away blood and slime to prevent slips.
Beyond the actual filleting, always be aware of your surroundings, especially if you're processing fish in a remote Alaskan cabin or camp. Wildlife, particularly bears, are attracted to fish guts. Ensure you dispose of scraps responsibly and according to local regulations, often by returning them to deep, fast-moving water or designated disposal sites, never leaving them exposed near living areas. This kind of awareness is critical, whether you're fishing under an Alaska Fishing License: Complete Guide or simply enjoying a remote fishing trip.
Storing Your Filleted Salmon
Once your salmon is filleted, trimmed, and pin-boned, the next critical step is proper storage. This ensures that the magnificent flavor and quality you’ve preserved through careful filleting translate into delicious meals later on.
- Rinse and Pat Dry: Give your fillets one final, quick rinse under cold water to remove any lingering scales or blood. Then, and this is crucial, pat them thoroughly dry with paper towels. Excess moisture can lead to freezer burn and a degradation of quality.
- Vacuum Sealing: For long-term storage, especially if you plan to How to Vacuum Seal and Ship Alaska Fish back home, vacuum sealing is the gold standard. It removes all air from around the fish, preventing freezer burn and extending its freezer life significantly, often up to a year or more.
- Wrapping and Freezing: If you don't have a vacuum sealer, wrap each fillet tightly in plastic wrap, ensuring no air pockets, then follow with a layer of heavy-duty freezer paper or aluminum foil. Label each package with the date and type of fish.
- Immediate Chilling: Get those packaged fillets into the coldest part of your freezer as quickly as possible. Rapid freezing helps maintain the texture and flavor.
Remember, the fish you catch in Alaska is a precious resource. Whether it's a King from the Kasilof River or a Coho from Prince William Sound, treating it with care from hook to plate ensures you savor every bit of your Alaskan adventure. Understanding When to Fish for Each Salmon Species in Alaska and then knowing how to properly process your catch are two sides of the same coin when it comes to a truly rewarding experience.
Disclaimer
Please note that fishing regulations, bag limits, and specific emergency orders in Alaska can change frequently. Always consult the most current Alaska Department of Fish and Game regulations booklet or their official website before heading out. This guide is for informational purposes only and does not supersede official regulations or best practices advised by local authorities or experienced guides. Fishing and fish processing inherently carry risks; always exercise caution and prioritize safety.