How to Cure Salmon Eggs for Bait
There’s nothing quite like the thrill of reeling in a magnificent Alaska salmon, but what do you do with those precious egg skeins afterward? Many anglers find themselves at a loss, either discarding them or not realizing the incredible potential they hold as prime bait. This guide is here to change that, showing you exactly how to transform fresh salmon eggs into irresistible, perfectly cured bait that will give you an edge on the water, turning those overlooked skeins into your secret weapon for future fishing adventures.
Why Curing Your Own Salmon Eggs is a Game Changer
Let's be honest, buying pre-cured salmon eggs from a tackle shop can get expensive, and sometimes, they just don't have that "it" factor. When you take the time to cure your own, you're not just saving money; you're creating a superior product tailored to your fishing needs, and frankly, there's a deep satisfaction in using bait you've prepared yourself. It connects you even more intimately with the fishing process, from catch to cure to a new catch.
The Allure of Freshly Cured Bait
The biggest advantage of curing your own salmon eggs is the undeniable effectiveness. Fish, especially salmon and trout, are incredibly sensitive to scent and texture. Store-bought eggs, while convenient, often lack the vibrant color, natural oils, and potent aroma that freshly cured eggs possess. When you cure them yourself, you control every aspect, from the freshness of the raw material to the exact blend of curing agents. This means you can create bait that is super attractive, durable enough to stay on the hook, and releases a consistent scent trail that can entice even the most finicky fish. Imagine drifting a perfectly plump, orange egg cluster down a river; the subtle waft of natural oils and the cure is a siren song to hungry salmon.
Cost-Effectiveness and Resourcefulness
Think about it: every time you harvest a salmon, you have a valuable resource in those egg skeins. Discarding them is like throwing money away. By learning how to cure salmon eggs for bait, you're not only being more resourceful with your catch but also significantly cutting down on your bait expenses. A single large King Salmon or a healthy Sockeye Salmon can provide enough skeins to cure a substantial amount of bait, easily lasting you several trips. This self-sufficiency is a hallmark of a seasoned Alaska angler. Plus, it means you're never caught off guard if your local shop is out of your preferred bait or if you decide to hit the river on a whim. This aspect of being prepared, knowing you have a fresh, potent supply, is incredibly empowering for any angler.
Essential Supplies for Curing Salmon Eggs
Before you dive into the curing process, it’s crucial to have all your ducks in a row. Having the right tools and ingredients makes the process smoother, more efficient, and ultimately, yields a better final product. Don't skimp on quality here; your bait is only as good as what you put into it.
Gathering Your Raw Materials
The absolute cornerstone of effective cured salmon eggs is the quality of the raw material: fresh salmon skeins. You want eggs that are plump, unbroken, and vibrant in color. The fresher, the better! Ideally, you'll be using skeins from salmon you've just caught, perhaps during the height of the Alaska Salmon Run Timing Explained. If you're not planning to use them immediately, refrigerate them quickly. Freezing fresh, uncured skeins is an option, but for the absolute best results, try to cure them within a day or two of harvesting. When you're cleaning your salmon, handle the skeins gently to avoid rupturing the eggs. You'll want to carefully remove them from the fish, leaving the membrane (the skein) intact as much as possible, as this will help keep the eggs together during curing. Many anglers will hold onto skeins from Coho Salmon, Sockeye Salmon, and especially King Salmon, as their eggs are often larger and more appealing to fish.
Curing Agents and Tools
Now for the curing agents. There are a few schools of thought here, but most involve some form of salt and a binding agent. You can find many of these items easily on Amazon, or at your local tackle shop.
- Curing Salts/Powders:
- Borax: This is a classic, inexpensive option. Borax helps draw out moisture, toughen the egg membrane, and is known for creating a durable, scented bait. It's often mixed with non-iodized salt and sometimes a touch of sugar.
- Commercial Cures (e.g., Pautzke, Pro-Cure, Atlas Mike's): These pre-mixed cures are incredibly popular for a reason. They contain a blend of salts, colors, scents, and preservatives designed for optimal results. Brands like Pautzke's Borax-O-Fire or Pro-Cure's Egg Cure are staples in many Alaskan angler's arsenals. They simplify the process and often yield beautifully colored and scented eggs.
- Non-Iodized Salt: Essential for drawing out moisture and preserving the eggs. Avoid iodized salt, as it can negatively impact the curing process and turn your eggs a murky color. Kosher salt or pickling salt are excellent choices.
- Sugar: Sometimes added in small amounts to enhance color and moisture retention.
- Colorants: If you're using a plain Borax cure, you might want to add food-grade dyes (like red, orange, or pink) to give your eggs that vibrant, irresistible hue that fish love. Many commercial cures already include color.
- Scent Additives (Optional): Anise oil, garlic oil, krill oil, or other fish attractants can be mixed into your cure to give your eggs an extra pungent kick. This is where you can truly customize your "Best Bait for Alaska Salmon" to match local preferences or your personal fishing superstitions!
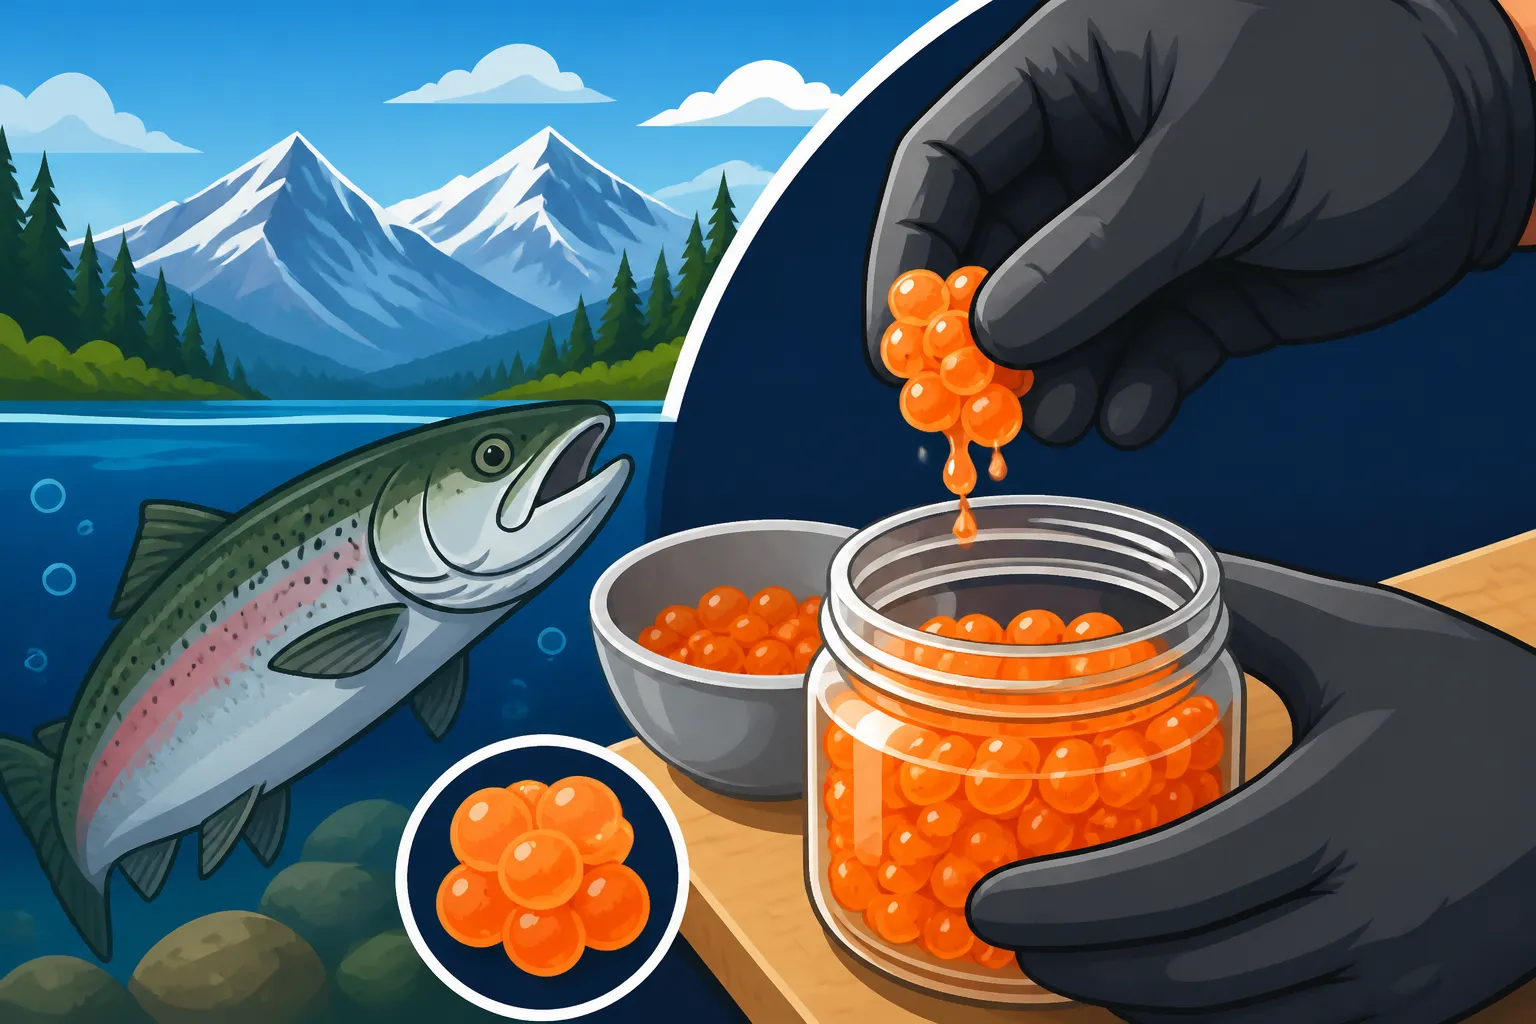
- Gloves: A must-have! Curing agents, especially those with strong dyes and scents, will stain your hands. Plus, it helps maintain hygiene.
- Mixing Bowls: Non-reactive bowls (glass or plastic) are best for mixing your cure and eggs.
- Paper Towels/Old Towels: For blotting excess moisture.
- Air-Drying Racks: Anything that allows air circulation around the eggs for even drying (e.g., wire racks, old screens).
- Storage Containers: Mason jars, Ziploc bags, or vacuum seal bags are ideal for storing your finished product.
Step-by-Step Guide to Curing Salmon Eggs
Alright, you've got your fresh skeins and all your supplies. Now it's time to get your hands a little dirty (but wear those gloves!). This process isn't overly complicated, but paying attention to detail will ensure you end up with top-notch bait.
Preparing the Salmon Skeins
The first step is critical for a good cure. You need to prepare the skeins to absorb the curing agents effectively.
- Gentle Handling and Rinsing: As soon as you remove the skeins from the fish, rinse them gently under cold water. The goal here is to remove any blood or debris without breaking the individual eggs. Don't let them soak; just a quick rinse. After rinsing, place them on paper towels or a clean cloth to drain and blot away excess surface water. You want them damp, not dripping wet.
- Breaking Down the Skein: This is where you decide on the form of your bait.
- Whole Skeins: For larger chunks of bait or if you plan to cut them into specific sizes later. This is often preferred for King Salmon eggs, where a substantial presentation is desired. You simply leave the entire membrane intact.
- Skein Mesh/Strips: Many anglers prefer to cut the skein into strips, roughly 1/2 to 1 inch wide and several inches long. This creates a more manageable piece of bait that's easier to secure to a hook or use in an egg loop.
- Single Eggs/Clusters: If you want individual eggs or smaller clusters, you'll need to break down the skein more thoroughly. You can do this by gently pushing the eggs through a mesh screen (like a coarse kitchen sieve or specialized egg-cure screen) or by gently massaging the skein to separate the eggs from the membrane. For smaller clusters, you might just gently pull apart the skein into bite-sized pieces. The method you choose depends on your preferred fishing technique and the species you're targeting. For example, smaller, tougher eggs are great for drift fishing, while larger clusters might be better for plunking.
Applying the Cure
Now for the magic! This is where the eggs transform into durable, scent-releasing bait. We'll focus on the dry curing method, which is most common and effective for salmon eggs.
Dry Curing Method (Powdered Cures)
This method is straightforward and highly effective, whether you're using a DIY Borax blend or a commercial product.
- Preparation: Place your prepared skeins or egg pieces in a large, non-reactive mixing bowl. Ensure you're wearing gloves!
- Applying the Cure: Liberally sprinkle your chosen dry cure over the eggs. If you're using a Borax blend (e.g., 1 part Borax, 1 part non-iodized salt, and a pinch of food coloring/scent), make sure it’s thoroughly mixed before applying. Don't be shy; you want every egg coated. For commercial cures like Pautzke's, follow the instructions on the package, but generally, a good dusting is needed.
- Gentle Mixing: Gently tumble and mix the eggs with the cure. The goal is to get an even coating on every egg. Avoid mashing or breaking the eggs unnecessarily. You might need to add more cure if some areas seem sparse.
- Resting Period (Initial Sweat): Once coated, cover the bowl and place it in the refrigerator. This is where the "sweating" process begins. The salts in the cure will start drawing moisture out of the eggs. Depending on the cure and the eggs, this might take anywhere from 4 to 24 hours. During this time, the eggs will release a reddish liquid.
- Draining and Re-mixing (Optional): After the initial sweat, you might find a significant amount of liquid in the bottom of the bowl. Some anglers prefer to drain this off, especially if they want a firmer egg. You can then add a light dusting of fresh cure and gently re-mix. Others prefer to let the eggs sit in their own brine for a bit longer, believing it helps with absorption. This is largely a matter of personal preference and desired egg texture.
- Second Resting Period: Return the eggs to the refrigerator for another 12-24 hours. During this phase, the eggs continue to absorb the cure, toughen up, and take on the color and scent of your mixture. Occasionally, you can gently tumble them again to ensure even distribution.
Drying and Storage
Once the eggs have fully absorbed the cure, they need to be properly dried to achieve the ideal texture and preserve them for long-term use.
- Air Drying: This is a crucial step for firmness and durability. Lay your cured eggs out in a single layer on paper towels or an air-drying rack. Place them in a cool, dry place out of direct sunlight. A garage or a cool room with good air circulation works well. Let them air dry for several hours, or even overnight, until they feel tacky but not wet. The exact drying time will depend on the humidity and temperature. You're looking for a firm, slightly translucent egg that won't fall off the hook easily.
- Proper Storage: Once dried to your liking, your cured salmon eggs are ready for storage.
- Refrigeration: For bait you plan to use within a few weeks, an airtight container in the refrigerator is sufficient. Mason jars or good quality plastic containers work well.
- Freezing: For longer-term storage (several months to a year), freezing is the way to go. Place the eggs in small, single-use portions in vacuum seal bags or heavy-duty freezer bags, removing as much air as possible. Label them with the date and type of cure. When you're ready to fish, simply thaw a bag in the refrigerator overnight.
- Vacuum Sealing: This is arguably the best method for long-term storage, as it prevents freezer burn and locks in freshness. You can find relatively inexpensive vacuum sealers on Amazon, and they’re a great investment for any angler who processes their own fish, not just for bait, but also for properly preserving fish caught for consumption.
By following these steps, you'll have a consistent supply of potent, attractive bait ready for your next adventure. If you're heading out to target specific species, make sure you know the Alaska Fishing Limits and Bag Limits Explained for what you can harvest and retain.
| Curing Agent | Key Characteristics | Best Use/Notes | Ease of Use | Cost-Effectiveness |
|---|---|---|---|---|
| Borax-based DIY | Draws moisture, toughens, preserves. Natural scent. | Good for custom colors/scents. Requires mixing with salt/sugar. | Medium | High |
| Pautzke's Eggs | Vibrant colors, strong scent, good durability. | Popular commercial choice. Variety of colors (red, orange, pink). | High | Medium |
| Pro-Cure Egg Cure | Excellent scent retention, good colors, flexible. | Known for strong attractants. Can be used for "soft" or "firm" cures. | High | Medium |
| Plain Salt Cure | Simple preservation, toughens slightly. Less vibrant. | Basic, good for adding custom scents/colors. Not as durable as Borax/commercial. | High | High |
Tips for Maximizing Your Cured Egg Bait's Effectiveness
Curing the eggs is half the battle; the other half is making sure they perform their best on the water. A little extra thought can go a long way in turning a good bait into an irresistible one. After all, you've put in the effort, now let's make it count!
Customizing Your Cure
One of the great joys of making your own bait is the ability to tweak and perfect it. What works wonders on the Kenai River might be slightly different from what's hot on a remote Interior Alaska stream.
- Adding Scents: While commercial cures often have scents built in, with a DIY Borax cure, you have a blank canvas. Anise oil is a classic for salmon and trout, thought to mask human scent and attract fish. Krill oil, sardine oil, or even a touch of garlic powder can be highly effective. You can experiment with different combinations. Just be sure to use food-grade scents and add them sparingly; a little goes a long way. Some anglers will even add a few drops of scent to their stored eggs just before a trip.
- Color Variations: Fish vision can vary depending on water clarity, light conditions, and even species. Having a range of colors in your arsenal can be incredibly useful. While bright red and orange are universally popular for salmon and trout, don't shy away from vibrant pink, chartreuse, or even natural white/cream. You can achieve these colors using food-grade dyes, easily found at grocery stores or craft stores. When applying, mix the dye thoroughly with your dry cure before sprinkling it on the eggs for even coloration. A good example might be using a vibrant orange for aggressive King Salmon on a sunny day, but switching to a more subtle pink for Sockeye Salmon in clear, shaded water.
- Consistency Adjustments: The ideal egg texture can depend on your fishing technique. For drift fishing in fast current, you want a firm egg that stays on the hook. For float fishing or still-water presentations, a slightly softer egg that breaks down and releases more scent might be preferable. You can adjust consistency by varying the drying time: more drying time equals a firmer egg. You can also experiment with the amount of cure used; more cure generally leads to a tougher egg. For delicate presentations, consider leaving them slightly softer, but ensure they are still durable enough to withstand casting.
Techniques for Fishing with Cured Eggs
Once you've got your perfectly cured eggs, knowing how to present them effectively is key. The right technique can make all the difference, drawing strikes from fish that might ignore other offerings.
- Different Rigs:
- Drift Fishing: This is a fantastic way to present eggs in rivers. Using a small weight (pencil lead, slinky weight, or split shot) to bounce your bait along the bottom, just slightly faster than the current. Your cured eggs, often in an egg loop knot or tied into a small spawn sac, will tumble naturally downstream, mimicking dislodged salmon eggs. Check out our guide on Drift Fishing in Alaska: How-To Guide for more detailed instructions.
- Float Fishing (Bobber Fishing): This method keeps your bait suspended at a specific depth, usually above the bottom. It's excellent for targeting fish holding in slower currents or pools. A well-presented cured egg under a float can be deadly, especially for Sockeye Salmon or Rainbow Trout. This technique is detailed further in our guide to Float Fishing in Alaska: How-To Guide.
- Plunking/Bank Fishing: Often done from shore, this involves casting a weighted rig out into the current and letting it sit on the bottom. It's a popular technique during strong salmon runs, especially for anglers targeting fish from the bank. For tips on where to find spots for this, explore Best Bank Fishing in Alaska. Your cured eggs, often in larger clusters or sacs, are placed on a leader with a heavy weight, allowing the scent to disperse in the current. Learn more about Plunking in Alaska: How-To Guide.
- How to Present the Bait:
- Single Eggs: For selective fish or when matching the hatch of smaller, natural eggs, threading a single, firm cured egg onto a small hook can be highly effective. This works well for trout and sometimes for particularly finicky salmon.
- Egg Clusters: Perhaps the most popular presentation, an egg cluster involves several eggs held together, often by the remnants of the skein membrane or a piece of netting. These create a larger, more visible, and scent-rich target. You can secure them with an egg loop knot, which is a simple yet incredibly effective way to keep eggs on your hook, even through aggressive casts and strikes.
- Spawn Sacs: For a highly durable and long-lasting presentation, you can tie small amounts of cured eggs into specialized mesh netting, creating a "spawn sac." These sacs can hold up to multiple casts and gentle pecking from fish, slowly releasing scent. They're excellent for both drift fishing and still water applications.
Remember to always consult the current Alaska Fishing Regulations Explained before you head out, as rules for bait and techniques can change, especially regarding single-hook rules or bait restrictions in certain areas. Investing in a good "Alaska Fishing Gear and Tackle Guide" can also help ensure you have all the necessary components for a successful outing with your newly cured eggs!
Disclaimer
Fishing regulations in Alaska are dynamic and can change frequently due to emergency orders, conservation efforts, and fish run fluctuations. Always consult the most current Alaska Department of Fish and Game regulations for the specific area and species you plan to fish before heading out. This guide is for informational purposes only and does not supersede official regulations. It is the angler's responsibility to know and follow all applicable laws.