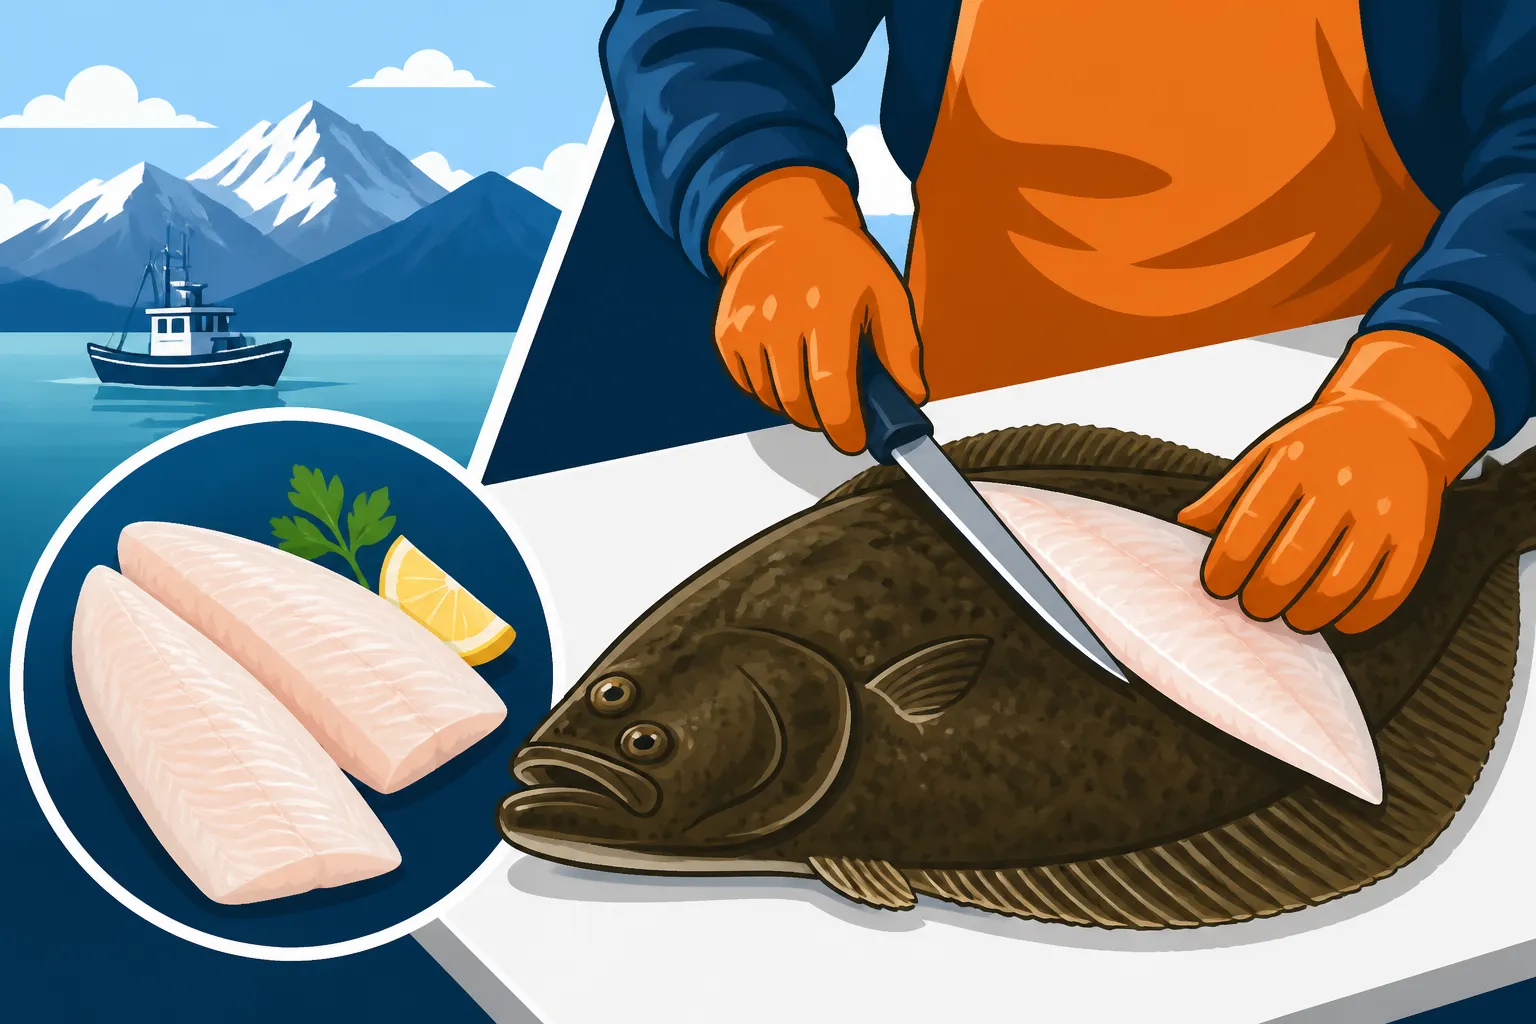
How to Fillet a Halibut
You've just landed a magnificent Alaska halibut, whether it was a 'chicken' or a true 'barn door,' and the thrill is absolutely electric! But then the real work begins. Transforming that massive flatfish into those pristine, boneless fillets you've been dreaming of can feel like a daunting task, especially if you're new to the game or usually stick to smaller fish. Don't sweat it – many anglers feel a little intimidated. This comprehensive guide is here to walk you through every step of filleting a halibut, ensuring you maximize your yield and enjoy every delicious bite.
Essential Gear for Halibut Filleting
Before you even think about making the first cut, gathering the right tools is paramount. Trying to fillet a large halibut with inadequate equipment is like trying to chop down a tree with a butter knife – frustrating, inefficient, and potentially dangerous. Investing in quality tools will not only make the job easier but also safer and result in far better fillets.
Choosing the Right Fillet Knife
A good fillet knife is your most important companion for this task. Unlike regular kitchen knives, fillet knives are designed with specific qualities that allow for precise, clean cuts along bones and through flesh without tearing.
- Blade Length: For halibut, especially those big ones, you'll want a longer blade, typically between 9 to 12 inches. A shorter knife will make it incredibly difficult to make those long, sweeping cuts required to separate the fillets from the backbone efficiently. A longer blade allows you to glide along the bone structure in fewer passes, reducing the chance of leaving meat behind.
- Blade Flexibility: While salmon filleting often benefits from a super flexible blade, for a halibut, you'll want something with a bit more backbone (pun intended!). A semi-flexible blade offers a good balance, providing enough give to navigate contours while still being rigid enough to push through tougher spots and maintain control against dense bone. Brands like Dexter-Russell or Victorinox are popular choices among commercial processors and can be found readily on Amazon.
- Sharpness: This cannot be stressed enough. A dull knife is dangerous and will tear the meat, leading to ragged, unappetizing fillets and wasted protein. Always start with a razor-sharp blade. Keep a sharpening stone or a ceramic honing rod nearby to touch up the edge as you work, especially if you're processing multiple fish.
Preparing Your Workspace and Safety Gear
Filleting a large halibut is a messy business, and it takes up a lot of space. Prepare your area thoughtfully to ensure cleanliness, efficiency, and personal safety.
- Large, Stable Cutting Surface: You'll need a cutting board that can accommodate the sheer size of a halibut. A small kitchen cutting board just won't cut it. Look for one that's at least 24×36 inches, preferably larger, made of food-grade plastic. Ensure it has a non-slip surface or place a damp towel underneath to prevent it from sliding around on your table. Many robust options are available on Amazon.
- Gloves for Grip and Protection: Halibut can be incredibly slippery, making it hard to maintain a firm grip. A good pair of gripping gloves, like those used by commercial fishermen, will give you the necessary purchase on the fish. Additionally, consider wearing a cut-resistant glove on your non-dominant hand, the one holding the fish, to protect against accidental slips of the blade. Safety first!
- Other Essential Items:
- Heavy-duty trash bags: For immediate disposal of guts, head, and bones.
- Cooler with ice: To store your fillets promptly after they're processed. The quicker they're chilled, the better the quality.
- Paper towels or rags: For quick clean-ups of slime and blood.
- A secondary, smaller knife: Useful for trimming and finer details.
Here's a quick reference table for your essential filleting gear:
| Item | Description | Why You Need It |
|---|---|---|
| Fillet Knife | 9-12 inch, semi-flexible, razor-sharp blade | Long, clean cuts; precise separation from bone. |
| Large Cutting Board | Food-grade plastic, 24×36 inches or larger, non-slip | Accommodates large fish; stable surface for safe cutting. |
| Gripping Gloves | Commercial-grade, non-slip texture | Secure hold on slippery fish; improves safety and control. |
| Cut-Resistant Glove | On non-dominant hand | Protects against accidental knife slips. |
| Sharpening Stone/Rod | Fine grit | Keeps blade razor-sharp throughout the process, preventing tearing. |
| Cooler with Ice | Sufficiently large for fillets | Rapid chilling preserves fish quality immediately after filleting. |
| Heavy-Duty Trash Bags | Large capacity | Efficient and hygienic disposal of offal and waste. |
The Initial Cuts: Setting Up for Success
You've got your gear, your workspace is prepped, and that magnificent halibut is staring you down. The first few cuts are critical. They define where your fillets will be and guide the rest of your process. Take your time here; a good start makes the whole process smoother.
Locating the Center Line and Dorsal Fin
Before you make any deep cuts, it's helpful to visualize the halibut's anatomy. Halibut, being a flatfish, has four distinct fillets – two on the top side and two on the bottom side. These are separated by the backbone, which runs down the center, and distinct fin rays.
- The Center Ridge: Lay the halibut flat, dark side up, on your cutting board. You'll feel a prominent ridge or raised line running down the center of its back, from just behind the head all the way to the tail. This is your primary guide for the first cut. This central ridge covers the spine and provides a natural channel for your knife.
- Behind the Gills/Pectoral Fin: Your first cut will start just behind the head, near where the gills and pectoral fin are located. You're looking for the natural 'collar' of the fish, where the meat transitions into the head structure.
Making the Head-to-Tail Cut
This is often the most intimidating but crucial first step. It creates the initial separation point for your upper fillets.
- The Deep Incision Behind the Head: Start by making a deep cut straight down, just behind the head, until your knife hits the backbone. Angle the knife slightly towards the head to get as much meat as possible. This cut should extend from the top center ridge all the way to the side of the fish, effectively severing the fillet from the head.
- Following the Spine: Now, orient your knife with the blade flat against the backbone, pointing towards the tail. Make a long, steady cut along the top of the backbone, following that central ridge you identified. Don't press too hard down into the bone; rather, let the knife glide just above it. You're essentially "peeling" the meat away from the backbone. This cut will run all the way from behind the head to the tail, separating the two upper fillets from each other along the spine.
As you make this cut, you'll start to see the white, firm flesh of the halibut. The goal is to keep your knife as close to the bone as possible to maximize your yield. If you're struggling with the length of the fish, don't hesitate to reposition yourself or the fish to maintain control. This foundational cut is what helps you establish the clean separation for the main fillets, a technique similar to how you would start to fillet a salmon, though a halibut's bone structure is quite different.
Filleting the Top Side: Two Pristine Sections
Now that you've established your initial cuts, it's time to liberate those beautiful top fillets. This process requires patience and a good feel for the knife against the bone. Remember, you're trying to remove as much meat as possible while leaving the bones clean.
Separating the Upper Fillets from the Backbone
With the initial head-to-tail cut made along the central spine, you now have a guideline for each of the two upper fillets.
- Working from the Spine Outward: Take your sharp fillet knife and insert the tip into the cut you made along the backbone. Angle your knife slightly so the blade is almost flat against the rib bones and spinal column. Begin making long, shallow cuts, working your way from the spine outwards towards the dorsal fin line. Think of it as carefully shaving the meat away from the skeletal structure. You'll feel the resistance of the bones, and the goal is to keep your blade pressing against them.
- Following the Rib Bones: As you move outward, you'll encounter the rib bones. Carefully guide your knife over these, pressing down firmly but not so hard that you cut into the bones. Use the natural curve of the bones as your guide. The longer the blade, the fewer passes you'll need, which means smoother fillets. Many experienced anglers will lift the meat slightly with one hand as they cut, allowing them to see where the blade is going and ensure they're staying tight against the bone. This takes practice, so don't get discouraged if your first attempts aren't perfect.
Detaching the Fillet from the Dorsal Fin Line
Once you've worked your way almost to the edge of the fish, you'll reach the dorsal fin line. This is where the fillet meets the fin rays.
- Cutting Along the Fin Line: Make a final, long cut along the entire length of the dorsal fin, from the head to the tail. This cut should separate the fillet completely from the fin rays. Sometimes, the fin bones can be a bit tough, so a slight sawing motion might be necessary here, but try to keep it smooth to avoid tearing the meat.
- Freeing the Fillet: With the cuts along the spine and the dorsal fin complete, your first upper fillet should now be largely free. Carefully lift it away from the frame of the fish. Inspect the carcass – if there's a significant amount of meat left on the bone, go back and try to trim it off. This is where experience really pays off. You'll repeat this entire process for the second upper fillet on the same side of the backbone.
Filleting the Bottom Side: Mirroring the Process
Once the dark, top side is complete, you'll flip the halibut over to expose the white, bottom side. The process for these two fillets is very similar to the top side, essentially mirroring your previous actions. However, some anglers find the bottom side slightly easier due to its flatter profile and fewer pronounced fin structures.
Creating the Bottom Center Line Cut
Just as you did on the dark side, you'll need to establish your guide cuts on the white side.
- Locating the Bottom Center: Flip the halibut over so the white side is facing up. You'll notice a similar central ridge or line running down the middle of the fish, although it might be less pronounced than on the dark side. This marks the location of the backbone.
- The Initial Incision: Start your cut behind the head, just above the gill plate on the white side, cutting down until you hit the backbone. Then, run your knife along the top of the backbone, all the way to the tail, just like you did on the dark side. This creates the starting point for separating your two lower fillets.
Removing the Lower Fillets
With the center cut established, you can now detach the lower fillets from the frame.
- Working from Spine to Ventral Fin: Insert your knife into the central cut, angling the blade almost flat against the spine and rib bones. Begin making careful, long cuts, working your way outwards towards the ventral (belly) fin line. Keep the blade pressed against the bones, using their contour as your guide. The goal is to leave as little meat on the carcass as possible.
- Separating from the Ventral Fin: The ventral fin area (sometimes called the 'belly fin') will be your outer boundary. Make a clean cut along this fin line, detaching the fillet from the remaining fin rays and thin belly membrane. As you gain confidence, you'll find a rhythm for these sweeping motions. This technique is fundamental for maximizing your yield, a common concern discussed in guides like How Much Fish Can You Bring Home from Alaska.
Once both lower fillets are detached, you will have four beautiful pieces of halibut. Take a moment to inspect them for any remaining bones or cartilage. Many people like to check for pin bones at this stage, though halibut generally don't have the same prominent pin bones as salmon. For more on different species, check out Alaska Fish Species Guide.
Skinning, Trimming, and Preparing for Storage
You've got your four beautiful fillets! Now comes the crucial step of removing the skin and any undesirable bits, transforming them into ready-to-cook portions. This part might seem simple, but doing it correctly ensures your halibut is top-notch.
The Art of Skinning a Halibut Fillet
Skinning a large halibut fillet requires a steady hand and a sharp knife. Many people find this part challenging because the skin can be quite tough and slippery.
- Laying the Fillet Flat: Place one fillet, skin side down, on your clean cutting board. Position the fillet so the tail end is pointing towards your non-dominant hand.
- Making the Initial Cut: With your non-dominant hand, firmly grip the very end of the tail flap of the skin. Using your sharp fillet knife, make a small cut at a shallow angle between the meat and the skin, just enough to create a small starting tab of skin that you can hold securely.
- The Sweeping Motion: Once you have a firm grip on the skin tab, lay your knife almost flat, with the blade angled slightly downward towards the cutting board. Apply gentle pressure to the knife, pushing it forward while pulling the skin firmly and steadily towards you. The key is to keep the knife stationary and let the pulling motion of the skin do most of the work, peeling the meat away from the skin. If your knife is sharp, this should be a smooth, continuous motion, leaving the skin behind and the clean, white meat exposed. It takes practice to get this right without tearing the meat or leaving too much flesh on the skin.
- Troubleshooting: If you find yourself cutting into the meat, adjust your knife angle to be flatter. If you're leaving too much meat on the skin, try to pull the skin tighter and apply slightly more downward pressure on the knife. Don't rush; slow and steady wins the race here.
Trimming and Portioning Your Fillets
Once skinned, your fillets are ready for final trimming and portioning. This is where you remove any dark meat, bloodlines, or ragged edges to get those perfect, appealing pieces.
- Removing Dark Meat and Bloodlines: Halibut fillets often have a thin layer of darker meat just beneath where the skin was, and sometimes a faint bloodline. While edible, many people prefer to remove these for a milder flavor and cleaner appearance. Use your smaller, sharp knife to carefully trim away these darker sections.
- Squaring Off Edges: Cut off any thin, ragged edges from the fillet to create nice, uniform portions. These trimmings are great for fish tacos, chowder, or fish spread!
- Portioning: Now, decide how you want to portion your fillets. Do you prefer large steaks, smaller individual portions, or strips for specific recipes? Cut the large fillets into your desired sizes. Remember that halibut is a dense, meaty fish, so portions don't need to be overly large. Consider how you'll cook it; thick steaks are fantastic for grilling, while thinner pieces are great for pan-searing.
Packaging for Freshness
Proper packaging is absolutely essential for preserving the quality of your hard-earned halibut. You want to prevent freezer burn and keep the fish tasting fresh for as long as possible.
- Vacuum Sealing: This is hands-down the best method for freezing halibut. A good vacuum sealer removes all air from the package, preventing freezer burn and greatly extending the shelf life of your fish. If you fish regularly, a vacuum sealer is a worthy investment.
- Freezer Bags with Water: If you don't have a vacuum sealer, you can use heavy-duty freezer bags. Place your fillet portions in the bags, add just enough water to cover the fish (this helps create an ice barrier against air), and then carefully squeeze out as much air as possible before sealing.
- Labeling: Always, always label your packages with the date and the type of fish. You'd be surprised how quickly you forget what's what in the freezer!
- Rapid Freezing: Place your packaged fillets in the coldest part of your freezer immediately after packaging. The quicker they freeze, the better the texture will be when thawed. For more detailed instructions, you might find How to Vacuum Seal and Ship Alaska Fish helpful.
Common Filleting Challenges and Solutions
Filleting a halibut, especially a large one, can present a few hurdles. Don't get discouraged if you encounter some common issues. Every cut is a learning experience, and with a little practice, you'll become a pro.
Dealing with Tough Skin and Slippery Fish
This is probably the most frequent complaint when filleting halibut. Their skin is thick, and the fish itself is covered in a slick layer of slime.
- Issue: The fish keeps slipping on the board, or the skin is incredibly difficult to grip and separate from the meat.
- Solution:
- For Slippery Fish: As mentioned, good gripping gloves are a game-changer. Ensure your cutting board is truly non-slip – placing a damp towel or non-slip mat underneath can make a huge difference. Some anglers even sprinkle a little coarse salt on the board to add friction, though you'll need to wash the fillets thoroughly afterward.
- For Tough Skin: Your knife's sharpness is paramount. A dull knife will drag, tear, and make skinning a nightmare. Keep it honed. If the skin is still being stubborn, try chilling the fillets slightly (but don't freeze them) before skinning; sometimes, this can firm up the meat and make separation easier.
Maximizing Meat Yield and Minimizing Waste
It's heartbreaking to see precious halibut meat left behind on the bones after all that effort. Wasting fish is a common frustration, especially with such a prized catch.
- Issue: You're leaving too much meat on the carcass, or your fillets are ragged and uneven.
- Solution:
- Knife Angle is Key: When separating the fillets from the backbone, keep your knife blade as flat and tight against the bone as possible. Visualize scraping the meat off the bone. A slightly upward angle can help you ride over the bone rather than digging into the meat.
- Feel for the Bones: Your non-dominant hand can gently feel the bones through the meat as you cut, guiding your knife. This tactile feedback is invaluable.
- Slow and Steady: Rushing leads to mistakes and wasted meat. Take your time, make deliberate cuts, and don't be afraid to go back and trim any remaining bits from the carcass. Those small scraps can be added to your fish chowder stash!
- Inspect the Carcass: After removing the four main fillets, always examine the remaining frame. Often, there's delicious cheek meat (behind the eyes) and small strips of meat along the backbone that can be salvaged.
Handling Large or Awkwardly Shaped Halibut
Some halibut are just massive, making them challenging to maneuver and fillet. A true "barn door" halibut needs a different approach than a 15-pound "chicken."
- Issue: The halibut is too large for your cutting board, or it's difficult to flip and position.
- Solution:
- Bigger is Better: If you're consistently catching large halibut, invest in the largest food-grade cutting board you can reasonably store.
- Portioning the Fish: For truly enormous halibut, you might consider cutting the fish into manageable sections before attempting to fillet. For example, you could cut the head and tail off, then cut the body into two or three large steaks, and then fillet each steak individually. This makes handling much easier.
- Teamwork: Don't be afraid to enlist a friend. One person can stabilize the fish while the other fillets. This is especially helpful when flipping or repositioning a heavy fish.
- Practice, Practice, Practice: Like any skill, filleting improves with repetition. The more halibut you fillet, the more confident and efficient you'll become. Each time, you'll learn a new trick or refine a movement. Don't be afraid to try different techniques or knife angles until you find what works best for you.
By understanding these common challenges and implementing these solutions, you'll be well on your way to filleting halibut like a seasoned Alaskan angler. After all, those fresh fillets are the best reward for a successful day out on the water.
Disclaimer
Please note that fishing regulations in Alaska, including bag limits and emergency orders, can change frequently. Always consult the most current Alaska Department of Fish and Game regulations for the specific area and species you are fishing before heading out. This guide provides general information for educational purposes and should not be considered legal advice regarding fishing practices or regulations.